Varied 18-hole course with stunning views over the Mosel heights – perfect for enjoying golf in a scenic Setting
About the Mosel Course
Golf enjoyment with a view
Our Mosel Course offers everything you need for a great round of golf: varied holes, a natural layout, and stunning views over the Mosel plateau, stretching out toward the Eifel and Hunsrück regions.
Whether you’re new to the game or already have some experience – with us, you’ll find the perfect mix of fun, sporting challenge, and relaxation. Cleverly placed bunkers, biotopes, and water hazards add variety without being overwhelming. The slight elevation changes make the course exciting, yet still enjoyable for hobby golfers.
Our greenkeepers care for the course every day with great attention to detail – ensuring top playing conditions from tee to green. And no matter what your score looks like: the relaxed atmosphere, fresh air, and peaceful surroundings make every round a special experience.
In short: the Mosel Course offers a diverse golfing experience for all skill levels – blending nature, movement, and enjoyment in a unique way.
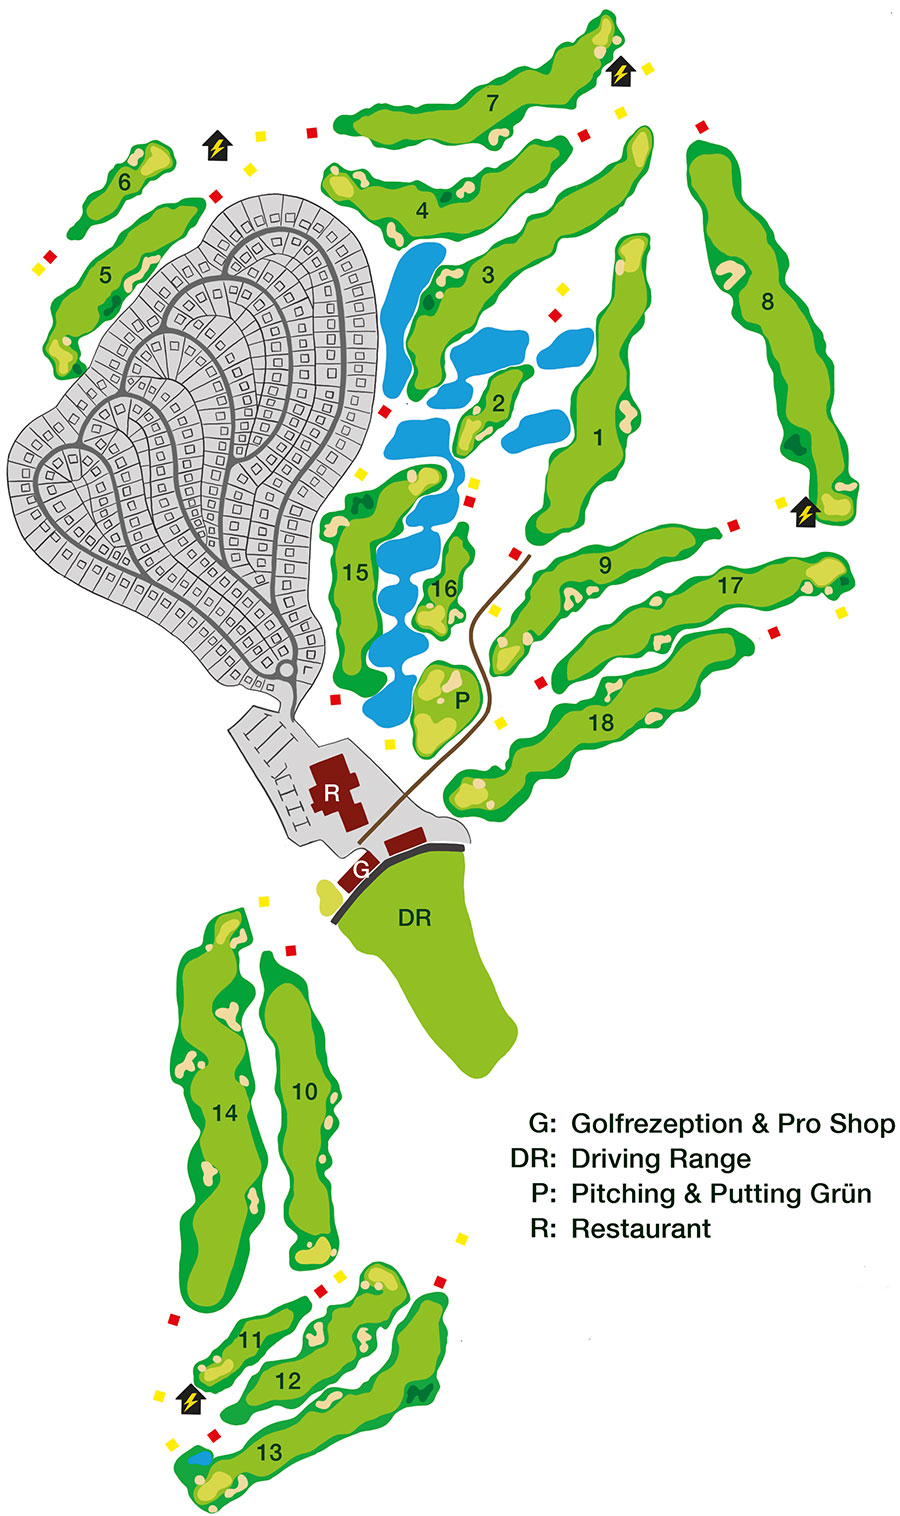
The tracks in detail
Hole 1 – A Start with Character
The first fairway has to be earned
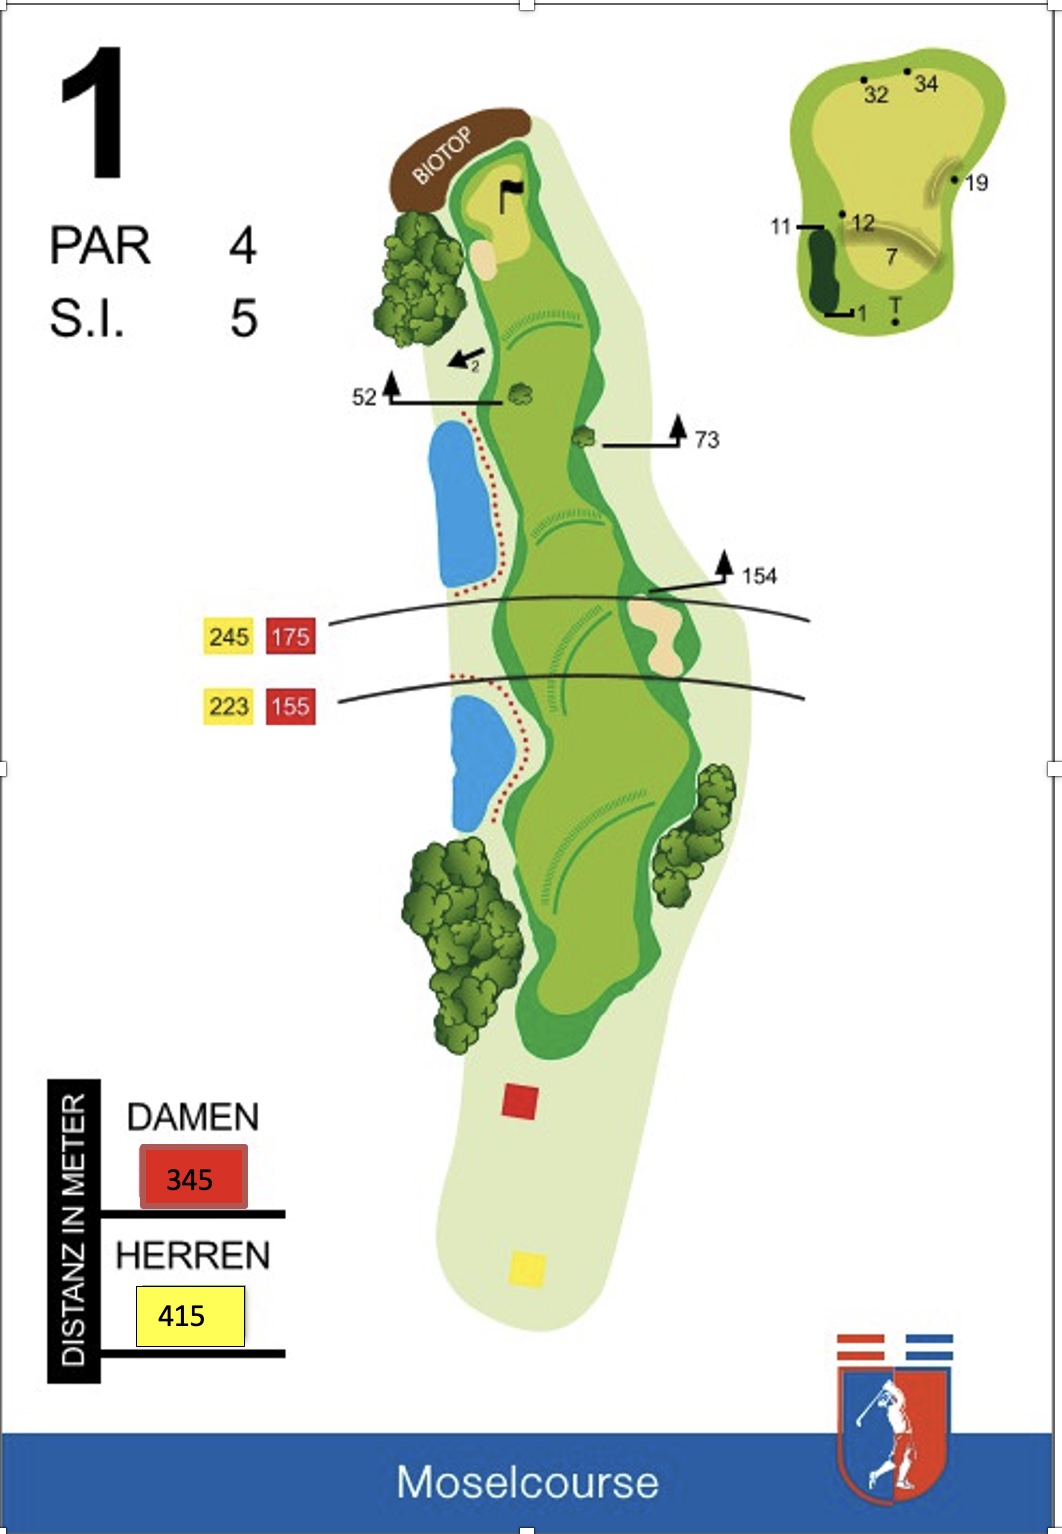
The round begins with a slight dogleg to the left. A friendly start? Yes—but one that already showcases what sets the Mosel Course apart: A good shot is rewarded, while an inaccurate one can quickly become a problem.
Long hitters should keep an eye on the bunker directly ahead. Those who hit the fairway safely will have a good starting position for their second shot. The key here is to stay as straight as possible. Two prominent trees can unexpectedly deflect what would otherwise be a good shot.
The large, flat green is protected on the left by a bunker and surrounded by natural habitats. Once the ball is on the green, you’ll find a fast, true-rolling putting surface.
Playing tip: At the start, it’s better to play with control rather than go for the spectacular. A good drive sets you up for the best chance of a successful first hole.
By loading this video, you agree to the privacy policy of Youtube.
Hole 2 – The First Par 3
Precision Over Power
Now it’s time to aim straight for the green. The length of the hole makes a direct approach entirely possible—but the green is tricky.
The fairway slopes upward toward the green while simultaneously sloping downward to the right. A poorly struck ball can quickly roll toward the right bunker.
Even more important is the flag position: The green has a significant slope. If you place the ball below the flag, you’ll be in a much better position for the putt.
Playing Tip: Pay attention not only to the distance but also to the flag position. On a par-3 hole, the first shot often determines whether you’ll shoot par or bogey.
By loading this video, you agree to the privacy policy of Youtube.

Hole 3 – The Birdie Opportunity
A par-5 with a great view and subtle challenges
From the elevated tee, the entire hole lies before you—including the distinctive ponds and the striking tree lurking in a potential flight path.
This par-5 is considered one of the easier holes on the course. Nevertheless, don’t let that impression fool you. The fairway slopes slightly to the right, causing an imprecise shot to quickly roll into the rough.
Position is also crucial on the second shot. Aim slightly to the left, because the closer you get to the green, the steeper the lateral slope becomes.
Those who strategize wisely on this hole will be rewarded: The relatively flat green offers an excellent chance for a birdie.
Playing Tip: It’s definitely okay to be aggressive here—but play smart. Focus on good placement rather than blind distance.
Those who play this hole smartly will be rewarded: The relatively flat green offers a real chance at a birdie—and makes this par 5, despite all its pitfalls, one of the most appealing holes on the course.
By loading this video, you agree to the privacy policy of Youtube.

Hole 4 – The Dogleg
The path to the green isn’t a straight shot
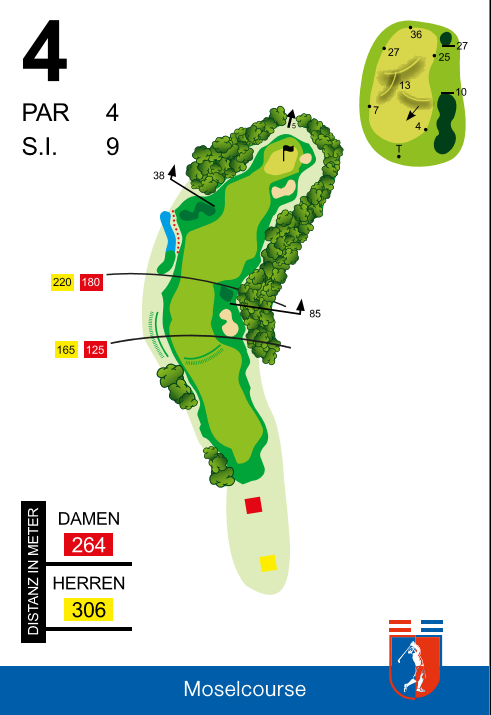
The dogleg to the right demands a good decision right from the tee. Obstacles line both sides of the fairway—woods on the right and bushes on the left—and the bunker on the right can quickly come into play.
If you place your tee shot well, you’ll have an excellent opportunity to attack the green with your second shot.
The green itself rewards a precise approach shot with a good putting opportunity.
Playing Tip: Don’t try to cut the hole short. If you get the ball safely into play, you’ll have a better starting position for par.
By loading this video, you agree to the privacy policy of Youtube.
Hole 5 – The Underestimated Challenge
It looks easy. But it isn’t.
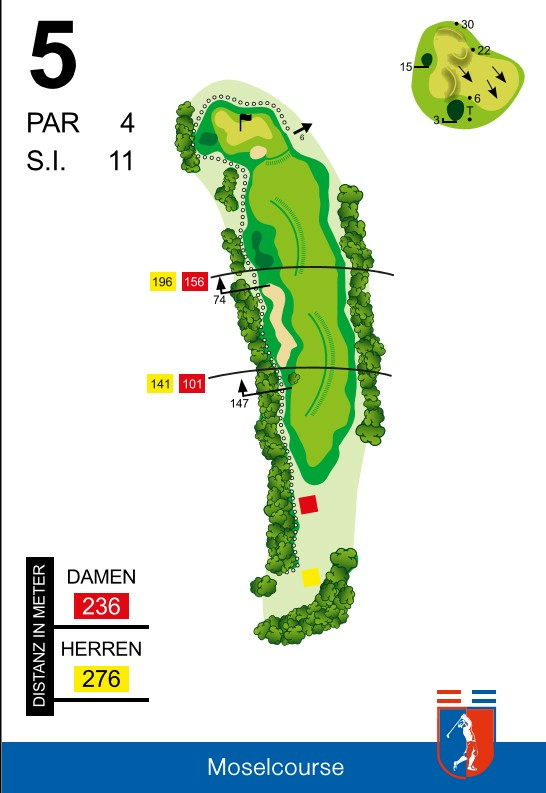
This hole has a special characteristic: It practically invites you to try too hard off the tee.
If you play too aggressively, you could end up in the woods on the right or heading toward the clubhouse on the left. On top of that, there’s a tree in the flight path—and a long bunker behind it.
Strategic golf is key here. The second shot should be planned so that the elevated green remains well within reach.
Concentration is also required there: A pronounced green slope makes the uphill putt more challenging than it initially appears.
Playing Tip: You don’t win this hole with brute force, but with smart placement.
By loading this video, you agree to the privacy policy of Youtube.
Hole 6 – The Friendly Par 3
Big Green, Small Decisions
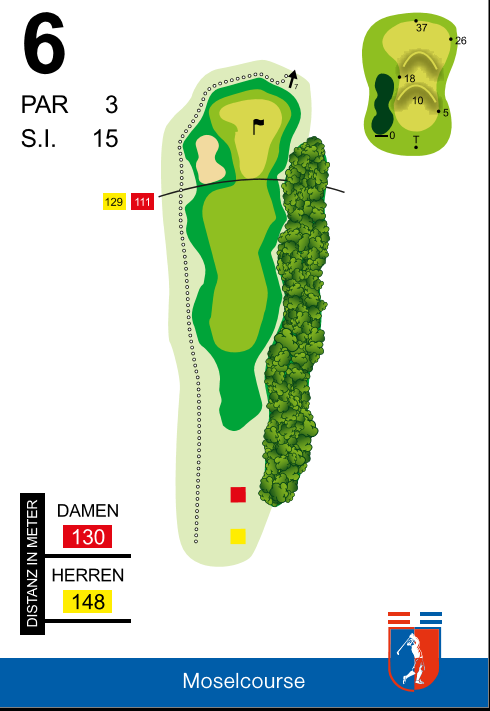
The shortest—or rather, easiest—par 3 on the Mosel Course seems reassuring at first. But the large green, which is about 37 meters deep, demands a precise club selection.
The flag position is crucial. Depending on where the flag is placed, the right club choice can vary significantly.
Playing slightly to the right is often the better choice, as the bunker and out-of-bounds lie lurking on the left.
Playing Tip: Don’t automatically choose the club you’d use for the center of the green. The flag determines your strategy.
By loading this video, you agree to the privacy policy of Youtube.
Hole 7 – The Hole That Commands Respect
Even good golfers find themselves pondering here
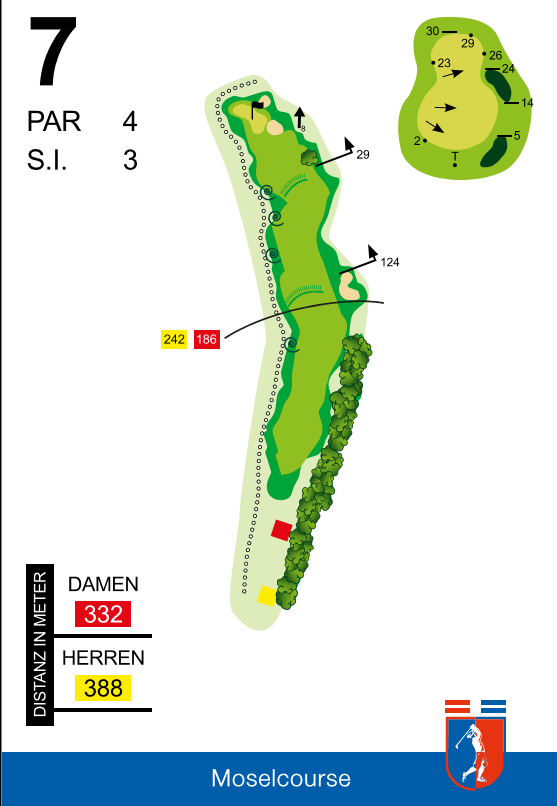
By this hole at the latest, the Mosel Course reveals its challenging side. Even skilled golfers find themselves pondering here—because reaching the green with the second shot is anything but a given.
Those with the necessary distance who place the ball well in the bend of the hole will put themselves in the best position to attack the green.
The ball should be played as high and controlled as possible toward the green. The slope of the green won’t forgive a ball that’s too fast. Two bunkers and out-of-bounds lie in wait behind the green.
A challenging hole that’s all the more enjoyable when played well.
Playing tip: Better to play a controlled approach shot than to force an attack. The green is waiting—it’s not going anywhere.
By loading this video, you agree to the privacy policy of Youtube.
Hole 8 – The Long Monster
Distance is key—but it’s definitely conquerable
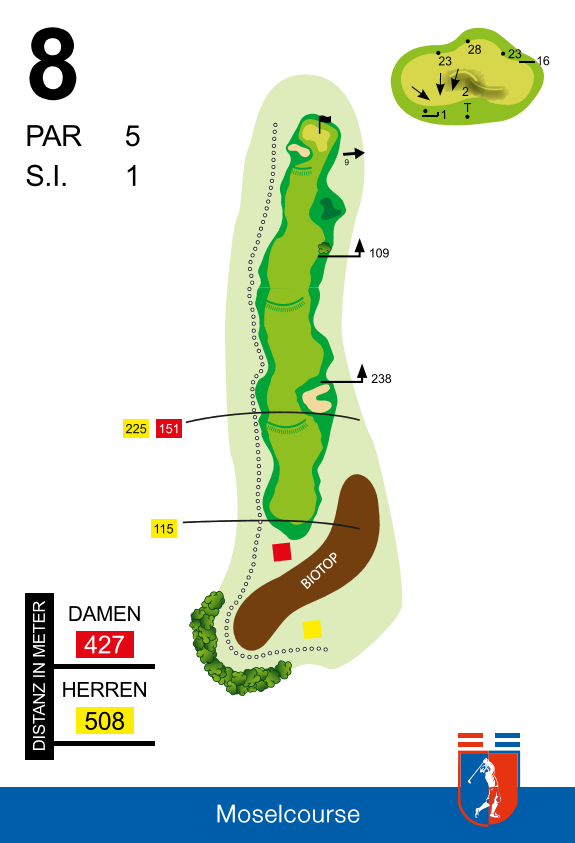
Here comes one of the course’s longest holes. A real monster? Maybe. Unplayable? Definitely not.
From the men’s tees, the shot crosses a biotope. If you can hit the necessary distance here, you’ll be in a good position. If you can’t, you can use the dropping zone behind the biotope.
From the ladies’ tees, play begins behind the biotope.
The other obstacles are manageable: out-of-bounds on the left, the biotope on the right. It’s not until you’re near the green that a sizeable bunker seriously comes into play.
The large green ultimately offers plenty of room for a controlled approach and has relatively little slope.
Playing Tip: Break the hole down into stages. Distance is helpful—but control is more important.
By loading this video, you agree to the privacy policy of Youtube.
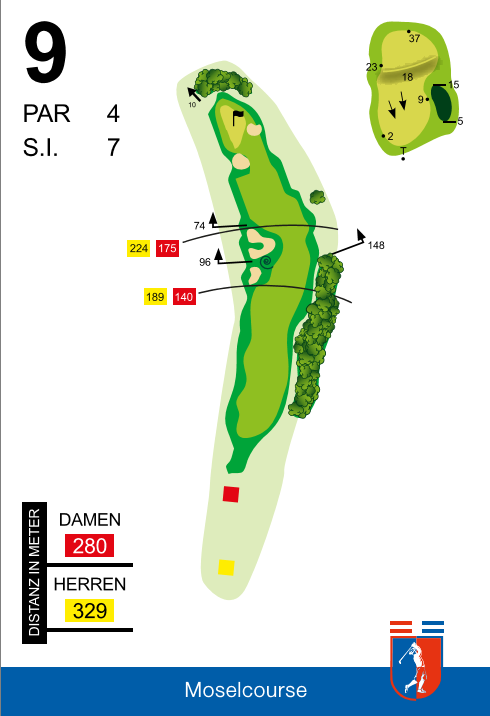
Hole 9 – A Tricky Midpoint
A Par 4 for Smart Decisions
A beautiful and tricky par 4 rounds out the first nine holes.
Depending on the length and direction of your drive, you may be able to clear the first bunker. If you want to play it safe, position the ball on the right side of the fairway.
After that, your skill level will determine the best strategy. Two bunkers await just before the green—and behind them lies a green with a significant slope.
If you play your approach shot precisely and place the ball on the green with control, you’ll have a good chance at par.
Playing Tip: Take a close look before your second shot. Be sure to factor the green’s slope into your plan.
By loading this video, you agree to the privacy policy of Youtube.
Hole 10 – The Open Playing Field
The Back Nine
It Starts Again After the Bridge
After crossing the bridge, the hole opens up, offering plenty of space at first. This is a pleasant opportunity to take a more relaxed swing again.
There are bunkers along the left edge of the fairway that should be taken into account when planning your shot. If you choose your line well, you can reach the green directly with your second shot—or at least play onto the front of the green.
On the green, the flag position is crucial. If you place your ball below the flag, you’ll gain a clear advantage on the putt.
Playing Tip: Don’t just aim for the green—think about the subsequent putt as early as your approach shot.
By loading this video, you agree to the privacy policy of Youtube.

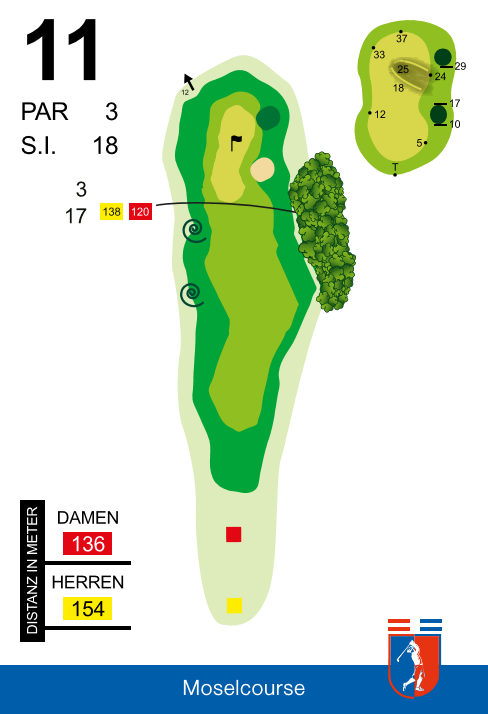
Hole 11 – An Invitation to a Birdie
But Watch Out for the Wind
At first glance, this par 3 looks extremely inviting. There are few obstacles, and a precise tee shot can immediately set you up for a good birdie opportunity.
But precisely because the hole seems so inviting, you shouldn’t get too excited too soon about what appears to be an easy shot.
The wind can significantly affect the ball’s trajectory and, above all, your club selection.
Playing Tip: Pause for a moment before your shot to check the wind. Then choose your club—not before.
By loading this video, you agree to the privacy policy of Youtube.
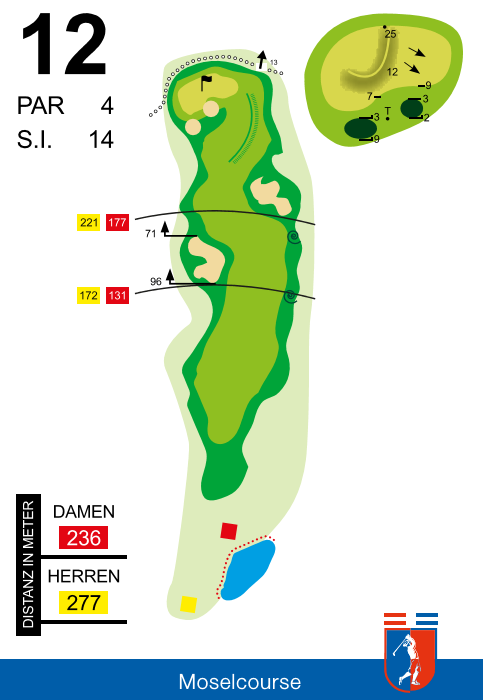
Hole 12 – A tailwind can be dangerous
Distance alone isn’t everything here
On this hole, a tailwind can be either a friend or a foe. A good tee shot can quickly carry the ball to the 200-meter mark—and thus closer to the danger zone than you might want.
A bunker awaits on the right, while the green is protected by two additional smaller bunkers. Add to that the nearby out-of-bounds area.
The slope of the green can also quickly turn a good approach shot into an extra putt.
Playing tip: Don’t underestimate a tailwind. Less can actually be more here.
By loading this video, you agree to the privacy policy of Youtube.
Hole 13 – The Long Journey
Precision from the Woods
A long journey toward the green begins from the woods.
At the tee, aim the ball slightly to the right so it lands safely on the fairway. Otherwise, the slope could quickly send it into the tall grass.
The second shot also requires a clear decision: the better line is to the right toward the green, as two tricky bunkers lie to the left.
And then comes the green. Depending on the flag position, the putt can be challenging—three putts are certainly possible here.
Playing Tip: Keep the green in mind as early as your second shot. If you play to the wrong side, you’ll pay for it on the putt.
By loading this video, you agree to the privacy policy of Youtube.

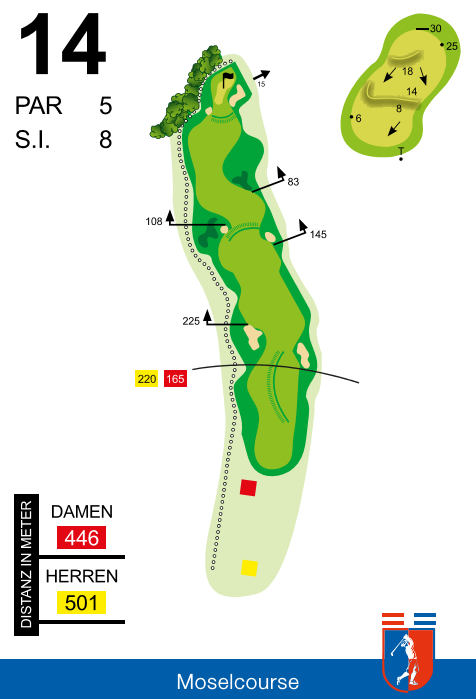
Hole 14 – The Bunker Par-5
They’re really everywhere here
Finally, another par 5—and with it, a welcome opportunity for long hitters to make the most of their distance.
But Hole 14 is also the hole with the most bunkers. After the first obstacle, the next traps are already waiting behind a hillock. And things get tight once again just before the green.
The green is slightly domed and slopes down on the left toward the nearby out-of-bounds area.
This hole demands full concentration both when approaching the green and once on it.
Playing tip: Don’t view every bunker as an invitation to hit over it. The safe line is often the fastest way to par.
By loading this video, you agree to the privacy policy of Youtube.
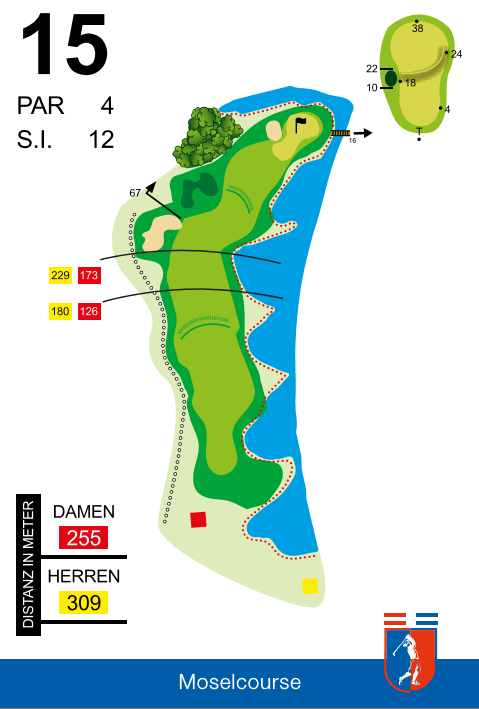
Hole 15 – Down into the Valley with a Tailwind
A Fast-Paced Dogleg
A true highlight of the Mosel Course: From the elevated tee, this dogleg to the right winds its way down into the valley.
The elevation ensures that the ball gains extra distance after the tee shot. But the temptation to take too much of a risk is strong.
A pond lies to the right, and a deep bunker to the left. Those who confidently navigate both hazards will be rewarded: with the second shot, a fast and easily playability green is within reach.
Playing Tip: Be bold—but don’t be reckless. The right line opens up an excellent birdie opportunity here.
By loading this video, you agree to the privacy policy of Youtube.
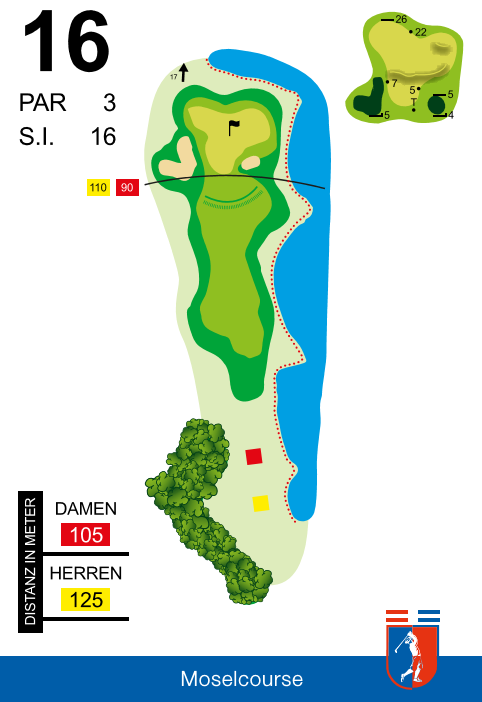
Hole 16 – The Short Par 3 with a Long Shadow
Short on the map, tough on the scorecard
Many golfers consider this short par 3 to be the most difficult par 3 on the course—and for good reason.
The hole plays uphill. Two bunkers flank the green, which is also significantly sloped. A first shot that’s too short or imprecise can therefore quickly result in a bogey or worse.
If you don’t reach the green directly, you’ll also have to play the subsequent approach shot with great precision.
Playing Tip: Precision counts more than distance here. It’s better to play it safe and aim for the safe side of the green than to force a heroic shot.
By loading this video, you agree to the privacy policy of Youtube.
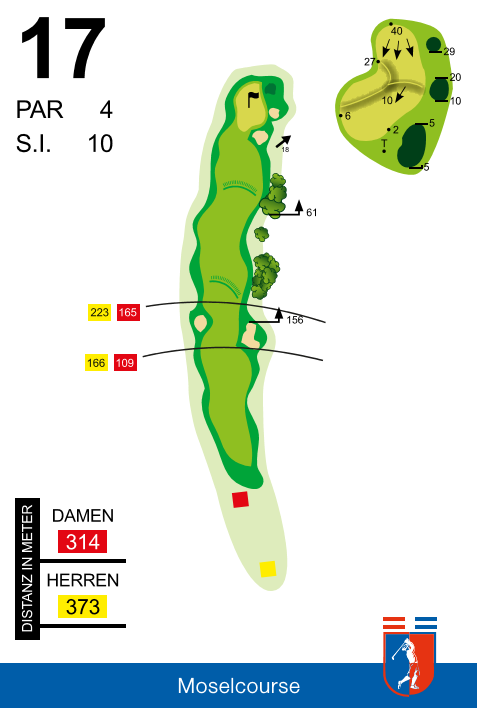
Hole 17 – Look First, Then Swing
The scenery is the most beautiful distraction
The penultimate hole once again offers a magnificent view of the landscape. But be careful: if you gaze for too long, you might forget your actual task.
Bunkers lie in wait on both the left and right sides of the fairway for an inaccurate tee shot. A good drive, on the other hand, is rewarded and can gain a few more meters thanks to the fairway’s surface.
Two more bunkers also lurk to the right of the green. However, the large green offers plenty of room for a precise approach shot.
On the fast, slightly tricky green, the flag position ultimately determines the difficulty of the putt.
Playing tip: Enjoy the scenery—but only after you’ve taken your shot.
By loading this video, you agree to the privacy policy of Youtube.
Hole 18 – The Grand Finale
You did it!
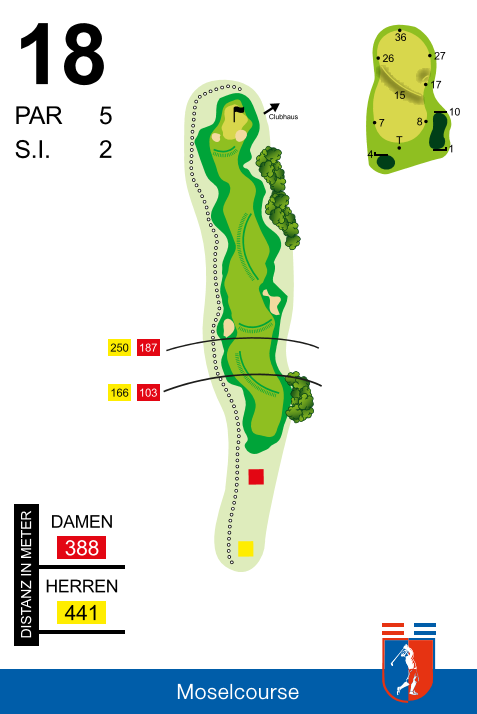
To wrap things up, there’s one more “monster” waiting for you. Not necessarily because of its length, but because your stamina is starting to wane after a long round of golf.
The constant slope makes the final hole even more challenging. If you place the ball well, you can attack the green with your third shot.
Deep bunkers come into play just before and next to the green. But the real challenge lies on the green itself: it has the steepest slope on the entire course.
A putt that’s too long can quickly roll far away from the hole here. On the upper plateau, however, the green rolls predictably.
The flag position determines the ideal line for the final shot.
And then?
You did it!
Playing tip: Focus one last time. The round isn’t over until the final putt has dropped.
By loading this video, you agree to the privacy policy of Youtube.